
Pinterest Marketing Strategy for Bloggers: A Complete Guide
Pinterest Marketing Strategy for Bloggers
If you’re a blogger struggling to get consistent traffic from Google or social media, Pinterest might be the opportunity you’re overlooking. Unlike platforms where posts disappear within hours, Pinterest works more like a search engine, allowing your content to keep attracting visitors for months or even years after it’s published.
Whether you’re running a food blog, travel blog, personal finance website, lifestyle blog, or any other content-driven site, a well-planned Pinterest marketing strategy can help you reach new readers without spending money on ads. Many successful bloggers use Pinterest to generate thousands of monthly page views, grow their email lists, and increase affiliate revenue.
In this guide, you’ll learn exactly how Pinterest works for bloggers, how to optimize your profile, create pins that get clicks, find the right keywords, and build a long-term traffic system that continues bringing visitors to your blog over time.
How Pinterest Is Different From Other Platforms
This is the most important thing to understand before you do anything else.
When you post something on Instagram or TikTok, that post has a lifespan of maybe 24 to 48 hours. After that, almost nobody sees it again. Pinterest works completely differently.
A pin you post today could bring you visitors in a month, a year, or even two or three years from now. The reason is simple: Pinterest’s algorithm is based on search, not on when something was posted. Pinterest displays the most pertinent results when a user searches for “easy dinner recipes for beginners,” regardless of when those pins were made.
For bloggers, this is a huge advantage. You create good content once, and Pinterest keeps distributing it for years.
Step 1: Set Up a Pinterest Business Account the Right Way
A lot of bloggers rush through this step and regret it later. A business account is completely free. It gives you access to Pinterest Analytics, lets you enable Rich Pins, and allows you to run ads if you ever need to.
How to Create a Business Account
If you already have a personal Pinterest account, go to settings and look for the “Convert to Business” option. If you are starting fresh, go directly to business.pinterest.com and sign up from there.
When setting up your account, pay attention to these four things:
Profile Photo: Use a real photo of yourself if you are building a personal brand. Use your logo if you run a niche website without a personal face attached to it.
Display Name: Always include your blog name here. If your blog is called “The Frugal Kitchen,” put that in your display name. Keywords help, but keep it natural do not stuff it.
Bio: You get 160 characters. Use them well. Be clear about who you help and how you do it. For example: “Simple vegetarian recipes for busy families. New posts every week.” Short, clear, and useful.
Website Claim: This is not optional. Claim your website in settings. Once you do this, your domain name shows up on every pin that links back to your blog, and it is also required before you can enable Rich Pins.
Step 2: Enable Rich Pins
Rich Pins automatically pull extra information from your blog and display it directly on the pin. For blog posts, these are called Article Rich Pins. They show your post’s headline, your name as the author, and your post description all pulled automatically from your website.
For this to work, your website needs Open Graph meta tags. If you use WordPress with Yoast SEO or Rank Math already installed, those tags are already there. You just need to go to Pinterest’s Rich Pins validator (search “Pinterest Rich Pins validator” on Google to find the current link, as Pinterest occasionally updates their developer portal URLs), enter your blog URL, and request Rich Pins from there.
Once Rich Pins are active, your article pins look more professional in the feed and generally get better engagement.
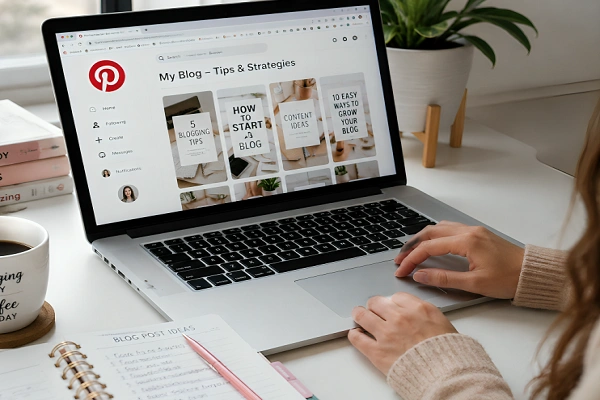
Step 3: Create Your Boards With a Clear Strategy
Boards are where you organize your pins. Think of them like folders but unlike regular folders, Pinterest actually indexes them and considers them when showing your content in search results.
How to Name Your Boards
Treat each board name like a keyword. Instead of “My Recipes,” use “Easy Weeknight Dinner Recipes.” Think about what your target reader would actually type into the Pinterest search bar, and build your board names around those phrases.
Always Fill In Board Descriptions
Many bloggers leave board descriptions blank. That is a missed opportunity. Write 2 to 3 natural sentences for each board that clearly explain what kind of content someone will find there. You should use important keywords, but write like a person, not a list of keywords.
How Many Boards Do You Need?
If you are just starting out, 10 to 20 boards is a good target. Quality matters more than quantity here. A board with only 5 pins sitting in it is not doing much for you.
Use Secret Boards for Testing
Secret boards are great when you want to try something new before fully committing. Do you wish to enhance your knowledge about something else? Create a secret board first, test it out, then make it public if it feels right.
Step 4: Design Pins That People Actually Click
Pinterest is a visual platform. How many people visit your blog is directly related to how your pins look.
Get the Size Right
Pinterest strongly prefers vertical pins. The standard recommended size is 1000 x 1500 pixels, which is a 2:3 ratio. Square pins work too, but tall vertical pins generally perform better in the feed because they take up more visual space.
Always Add Text to Your Pins
Do not just use a pretty image with no words. Add a text overlay that clearly tells people what the pin is about. Keep the text bold and easy to read. A lot of people browse Pinterest on their phones, and small or decorative fonts are hard to read on a small screen.
What should the text say? Either the title of your blog post or a strong reason to click on it. Because it is so straightforward, a headline like “10 Budget Meals Under $5” encourages readers to keep reading.
Be Consistent With Colors and Fonts
Stick to a consistent color palette and font style that matches your blog branding. Over time, your regular audience will start recognizing your pins just from the visual style before they even read the text. Canva is a free tool that works very well for creating Pinterest graphics, and you can save your brand templates there for quick use.
A Note on Images With Faces
Generally speaking, pins that focus on the subject matter, the finished dish, the product, the completed project tend to perform better than pins where a person’s face is the main visual focus. The idea is simple: people clicking on a recipe pin want to see the food, not a selfie. Let the content be the hero of the image.
Step 5: Write Pin Descriptions That Help With Search
After your design, the pin description is the next most important element.
How to Write a Good Description
Pinterest’s search algorithm reads your text. Include 2 to 4 relevant keywords naturally in each pin description. The key word there is naturally not to write “recipe easy recipe dinner recipe chicken recipe.” That looks like spam and Pinterest treats it that way.
A good pin description is usually between 100 and 200 characters. It tells people clearly what the pin contains and gives them a reason to click through to your blog.
Here is an example of a description that works: “Looking for a quick weeknight dinner? This 20-minute lemon garlic pasta is made with pantry staples and is perfect for busy families. Full recipe on the blog.”
Using Hashtags on Pinterest
Hashtags work on Pinterest, but not the way they work on Instagram. You only need 2 to 5 of them, and they should be specific to your content.
Step 6: Post Consistently There Is No Shortcut Here
This is where most bloggers struggle.
How Many Pins Per Day?
For someone just starting out, 5 to 10 pins per day is a reasonable goal. These should be a mix of some of your own content, some from other people in your niche.
Only pinning your own content looks spammy to Pinterest’s algorithm. A good balance is roughly 20 to 30 percent of your own pins and the rest from other creators in your space.
Use a Scheduling Tool
Manually posting 10 pins every single day is not sustainable for most people. Tailwind is a popular scheduling tool that is officially approved by Pinterest as a marketing partner. You can batch your pinning for the whole week in one sitting. Buffer also supports Pinterest scheduling if you prefer that.
Tailwind’s SmartSchedule function, which determines when your audience is most likely to be online and schedules your pins for those times, is what I found appealing.
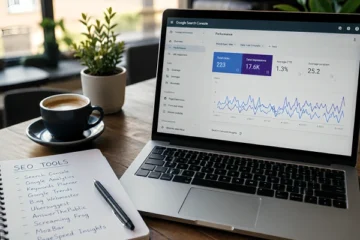
Step 7: Keyword Research for Pinterest SEO
On Google and Pinterest, keywords are crucial. What distinguishes them is how you perceive them.
Start With the Pinterest Search Bar
This is the simplest method. Type your main topic into the Pinterest search bar and watch the autocomplete suggestions that appear. Those suggestions are based on what real users are actually searching for. Write those down; they are your keywords.
Use the Guided Search Bubbles
After you run a search on Pinterest, you will see a row of colored keyword bubbles appear near the top of the results page. These are related terms that Pinterest is actively suggesting. Use these in your board names, board descriptions, and pin descriptions.
Look at What’s Already Working
Find the top pinners in your niche and spend some time looking at their boards and popular pins. What keywords are they using? What does their pin design look like? What topics get the most engagement? This research gives you a shortcut you do not have to figure everything out from scratch.
Step 8: The Truth About Group Boards Today
A few years ago, group boards were a core part of every Pinterest strategy. The situation has changed.
Pinterest’s current algorithm favors personal boards over group boards. On top of that, many group boards have become filled with low-quality or outdated content, which has pulled down their overall performance.
Does this mean group boards are completely useless? No, it’s still worth it to join good, regularly managed group boards in a certain niche. But the old strategy of joining as many group boards as possible and mass-pinning your content to all of them that approach is no longer effective.
If you want to join a group board, look for these signs before requesting to join: the board is regularly receiving new pins from contributors, the board owner is active and engaged, and the board’s topic is closely aligned with your niche.
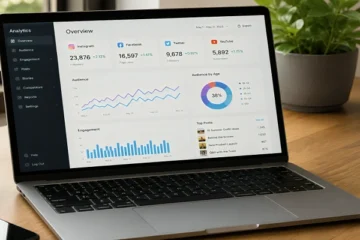
Step 9: Understanding Your Pinterest Analytics
Checking analytics might feel tedious, but it is where you find out what is actually working so you can do more of it.
The Metrics That Matter
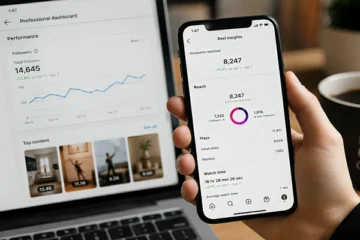
Impressions tell you how many times your pins appeared on someone’s screen. This is a reach and visibility metric.
Saves tell you how many people saved your pin to one of their own boards. This is a strong sign that someone found your content valuable enough to keep.
The number that writers care about the most is outbound clicks. This tells you exactly how many people clicked from your pin to your blog. Everything else is secondary to this.
The click-through rate (CTR) is the number of clicks split by the number of impressions. The average on Pinterest tends to fall somewhere between 0.5 and 2 percent, depending on your niche and content type.
How to Use Analytics Practically
Check your analytics once a month. Look at which pins are driving the most clicks and create more content on those topics. See which boards have the strongest performance and lean into those subject areas. Check your audience demographics section too. It shows you where your visitors are coming from and what else they are interested in, which can inform your content planning.
Step 10: Seasonal content can work, but you need to research ahead of time
Pinterest users search for seasonal content much earlier than you might expect typically 45 to 60 days before the actual event or holiday.
What this means in practice: if you want to publish Christmas recipe pins, you should start uploading them in early October, not December. This feels counterintuitive, but it is how Pinterest works.
Put together a simple content calendar that marks the major holidays and seasonal events throughout the year. Then work backward two months from each one and set a reminder to start creating and pinning related content at that point.
Common Mistakes Bloggers Make on Pinterest
When people are new to the site, they make the same mistakes over and over again:
Pinning the same image repeatedly: If you pin the same exact pin to multiple boards over and over, Pinterest’s spam filters will pick it up. Create several different pin designs for each blog post and spread those out across your boards instead.
Only creating pins for new content: Your older blog posts deserve pins too. A single blog post can have 5 to 10 different pin designs, each emphasizing a slightly different angle or headline. This is one of the most underused tactics for growing Pinterest traffic.
Skipping the website claim step: This was mentioned earlier but it is worth repeating. Pins that link to an unclaimed website do not display your domain, and you cannot enable Rich Pins without it. Do this early.
Being inconsistent: Posting 50 pins in one day and then disappearing for three weeks is one of the worst things you can do on Pinterest. The algorithm rewards steady, consistent activity over time. Slow and consistent will always beat occasional bursts.
What’s the real time it takes to see results?
This is the question every blogger asks, and it deserves an honest answer.
Pinterest is a slow build. The first three months are often discouraging; traffic may be minimal or close to zero even if you are doing everything right. Between months four and six, if you have been consistently active, you usually start seeing a noticeable increase. After about a year of steady effort, Pinterest can become a meaningful and reliable traffic source.
This timeline is similar to Google SEO. If you need fast results, Pinterest will frustrate you. But if you are patient and consistent, the payoff is a traffic channel that keeps working for you long after the initial effort and one that is less volatile to algorithm changes than most other platforms.
A Simple Starting Point If You Feel Overwhelmed
If all of this feels like a lot, here is a straightforward way to begin without overthinking it:
Month one: Focus only on setup. Create your business account, build 10 to 15 boards, claim your website, enable Rich Pins, and create 10 to 15 pins from your best existing blog posts.
Months two and three: Build a routine. Aim for 5 to 7 new pins each week, a mix of your content and content from others in your niche. Use a scheduling tool to make this manageable.
End of month three: Open your analytics and look at what is performing. Put more energy into the topics and formats that are already showing signs of working.
Pinterest is not a shortcut. But bloggers who work it consistently end up with a traffic source that runs quietly in the background, sending visitors to their blog long after the pins were first created.
This guide is based on Pinterest’s publicly documented features, business help center guidelines, and widely verified best practices. Pinterest’s algorithm does get updated from time to time, so it is worth checking the official Pinterest Business Help Center periodically to stay current.